Search This Blog

Showing posts with label FPV. Show all posts

Saturday, 11 January 2025

Beginners RC and FPV gear for 2025

Here are some suggestions for the best beginners RC and FPV gear in 2025.

I am recommending radios with EdgeTX operating system and ExpressLRS RF link for the best future proofing.  This gear will be suitable for beginners and basic models right through to advanced users. 

ExpressLRS has now matured enough to be a reliable RC link system with superior range and link security. I would recommend using an ELRS radio with ELRS receivers, then adding an external 4in1 Multiprotocol Module for non-ELRS receivers.

RC Gear

Transmitters

Radiomaster Pocket ELRS

The Pocket is the cheapest and smallest radio but has all the functions and range of much more expensive systems. It has two 3 pos switches, a latching button, two momentary buttons and a slider on the top right. 

The antenna is fixed but able to rotate and fold away.

The screen is quite small which might be a problem for aging eyes.

Maximum output power of 250mW gives range of several km.


Radiomaster Boxer ELRS

The Boxer is closer to a normal sized radio with longer battery life, bigger screen and more switches. Two 2 pos, two 3 pos switches, one latching button, one momentary button and two pot knobs.

Output power of 1W gives range of tens of km. 


Receivers

Radiomaster ER PWM receiver range

The ER ELRS receivers have PWM pins for each channel and are designed to operate servos directly. 

Range of several km is possible with the Pocket and Boxer radios.

4, 6 and 8ch receivers are available, some with a barometer for vario feedback and battery monitoring.


Radiomaster RP serial receiver range

The RP ELRS  Serial receivers are designed for use with Flight Control Boards where a serial connection is required.

Serial connection means all 16 channels are sent down one wire.


Analog FPV Gear

The following gear is all standard definition analog because it is much cheaper than Digital HD. It is best to learn FPV using the cheaper analog systems then step up to digital later.

Goggles / Screen

The dual screen goggles like Skyzone or Fatshark are too expensive for beginners and it's best to save your money for future digital goggles purchase.

Eachine EV800D single screen goggles

These are a good compromise between cost and features. The screen can be detached from the goggles and used just as a screen. It has built in DVR recording and dual antennas.


FPV cameras

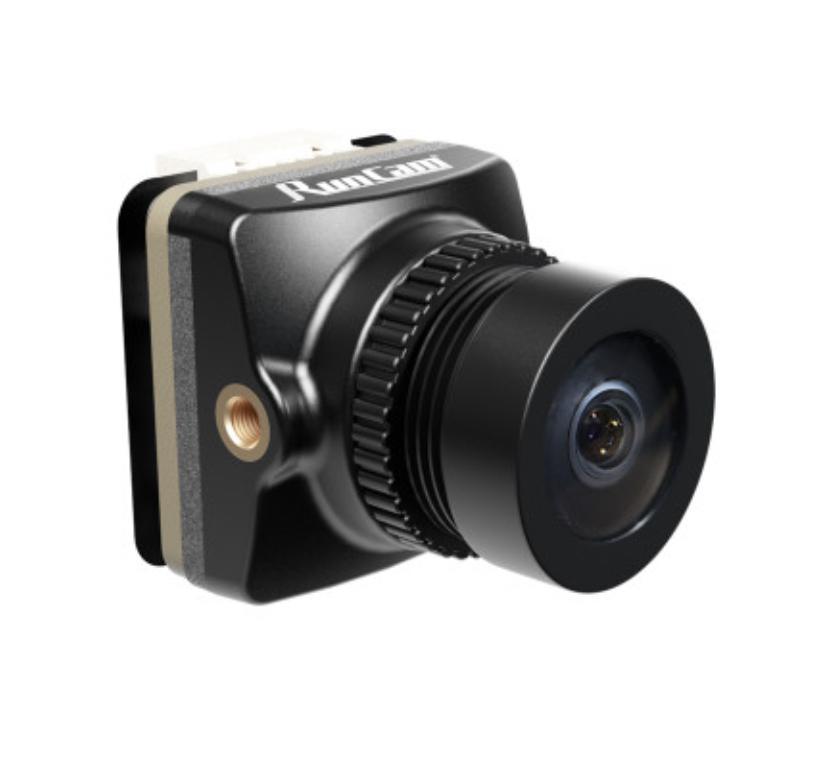
Runcam Phoenix 2 

This is my favourite analog FPV camera with 4:3 and 16:9 aspect ratio and great picture quality. The lens has a nice wide angle view.

There are many other camera options and anything similar will work for FPV as long as you pay attention to the required input voltage. Some cameras can only handle 5V and others can handle a wider range.

I prefer 16:9 aspect ratio and a wide angle lens (2.1 - 2.5mm) for use on fixed wing models.


Video Transmitters (VTx)

There are so many options for VTx that it's hard to narrow down the choice. 

I would avoid the ultra high power VTx. More than 1W power is just not necessary for normal FPV.

Anything with 1W or less is all you need for a few km of range. More range is best achieved with a high mounted directional receiver antenna, rather than pumping out more power.

You may also need to buy an antenna for the VTx. Take note of the antenna connection style such as SMA, RP-SMA, MMCX, uFL.


Here are some suggestions

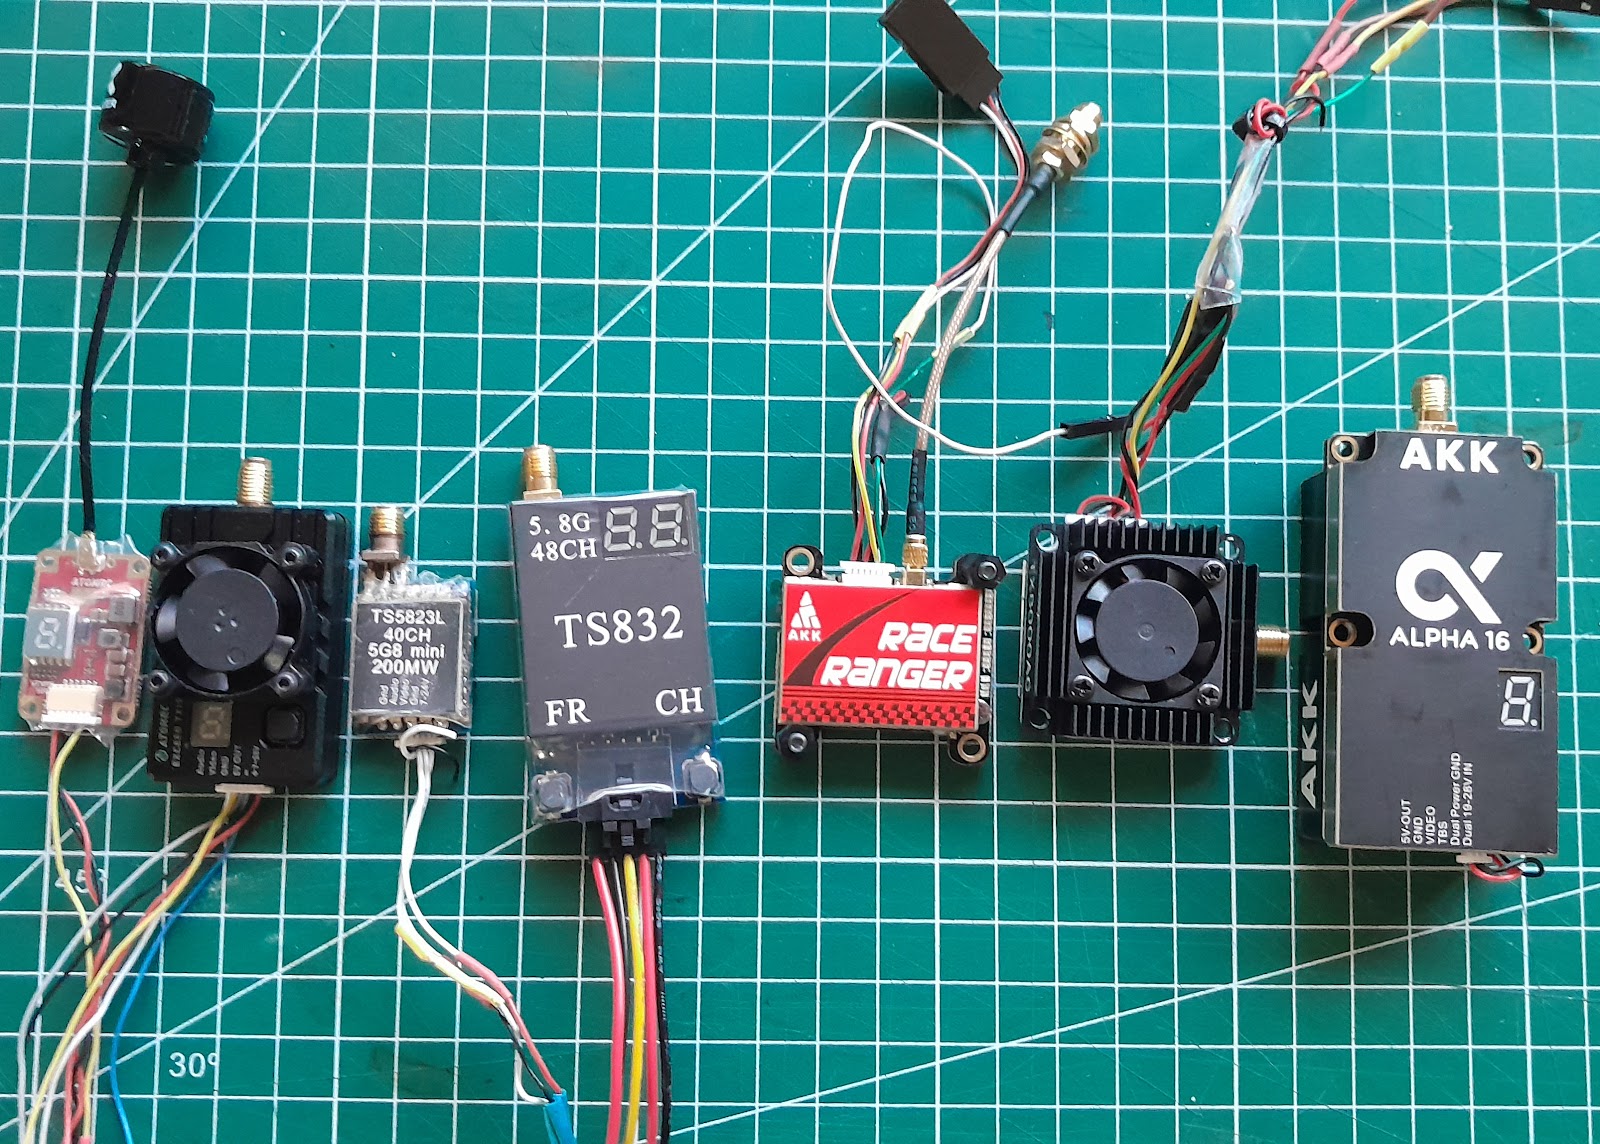
AtomRC TX800 

AKK TS5832S 

AKK X2 


All-In-One units (AIO)

Eachine TX05 AIO FPV 

The cheapest and easiest entry to FPV is to use an AIO camera and VTx

They are not the best quality or range but you just have to supply power (usually 5V) and find the channel in your goggles.

They can also be easily swapped from model to model.


HD video cameras

For high quality onboard video recording here are some great options. 

Runcam Thumb 1080 and Thumb Pro 4k

The Thumb cameras are small and light weight but can record excellent video. They don't have an internal battery and require 5V input to operate. This can come from the receiver or another 5V source.

They have a gyro built in and can record a motion data file to be used for Gyroflow stabilised video.


Runcam 2 4k

Has a removable battery, so power from the model is not required. If you remove the battery and connect to the VTx it can also be used as an analog FPV camera as well as 4k HD recorder.


Sunday, 22 September 2019

Best Cheap FPV gear

Here are my tips for the best cheap FPV gear.  Perfect for entry level or budget constrained pilots, but this gear will still be useful as your FPV requirements progress.

All In One camera and Video transmitter (AIO)

These camera / VTx combos are the simplest way to convert a plane to FPV. They are light and inexpensive and easy to swap from plane to plane.

The down sides are:
- The camera will not be the best quality, with lower dynamic range and large fisheye distortion.
- The range may not be as great as a more expensive Video Transmitter.
AOI VTx power output ranges from 25m to 200mW, giving range of maybe 100m up to many hundreds of meters.
- Voltage input is usually 3.5 to 5V. This means you cant run them straight from your flight battery. Best option for cleanest FPV video is to use a separate 1S battery for the FPV, or you can run it from the receiver or BEC.

Eachine TX02 200mW is my current recommendation - Eachine TX02 Banggood

FPV Goggles / screen

Recommending goggles is more difficult.

- Proper two screen goggles like Fatsharks, Skyzones and Aomway Commanders are very expensive, so I'll discount them for this discussion.
- Single screen box goggles are much cheaper but will not suit everyone. I need +1.0 close-up glasses for reading and I find that I cannot focus on the screen with most box goggles. I have modded some by glueing close-up lenses into the box enclosure.
- FPV screens by themselves can be a good solution but they are often more expensive than the box goggles.

Eachine EV800 goggles combine a detachable screen with goggles mount, so I think these are the best cheap option. The screen part can be mounted on a tripod or directly on your transmitter, and it includes the video receiver, battery and antenna. They also come with good quality antennas.


Eachine EV800 is the cheapest option with single clover leaf antenna - Eachine EV800 Banggood 


Eachine EV800D has clover leaf and patch antennas for greater range, and a DVR for recording the FPV feed - Eachine EV800D Banggood


Eachine EV800 screen on transmitter


Eachine EV800 review


Sunday, 4 February 2018

My FPV gear

FPV Goggles, cameras and video transmitters.

I strongly recommend trying goggles on before you buy. They must suit your vision, Inter Pupilary Distance IPD and the shape of your face. Idealy I would like a bit more IPD and focus adjustment to suit my vision and big head. For normal reading I need +1.0 diopter glasses.

My goggles are  Aomway Commander V1S goggles Much cheaper than FatSharks but with a decent quality 16:9 picture and DVR recording. Supplied with excellent patch and cloverleaf antennas and the diversity receivers give great range. Range of 3km on 200mW is possible in perfect conditions.


In the single screen goggles I like the Headplay SE box.
I needed to fit the included RHO narrower view lenses to see the screen clearly.
Spectacular viewing experience but limited by the lack of diversity receivers. Supplied with an add-on DVR unit


My preferred antennas are 5.8GHz Right handed circular polarised Aomway  clover leaf


They come in SMA or RP-SMA connector style,  and you need to choose the correct style to match your goggles and video transmitter. SMA antennas have a prong, RP-SMA have a hole.


My preferred Video transmitter (VTx) is the TS5823L  Eachine 200mW 40ch TS5823L 
It is compact and has a single push button to select channels and a single digit LED display.
The wires are stiff and delicate so need to be handled carefully.

There is a TS5823S version with a 5V regulator onboard, but I found this produced diagonal lines in the FPV feed.


Antenna connector is RP-SMA


Video transmitters come in a variety of power ratings.
25mW for small park flying and racing
200mW for general FPV
600mW for longer range, but be aware this will cause more interference to others. Only use if no-one else is flying FPV nearby.


VTx connection
I solder on a female servo-style connector to the Red, Black and Yellow wires for Power, Ground and Video signal. The other two wires are for Audio which I don't use.


I like a dedicated FPV camera like the Runcam Sparrow or Eagle 2 Pro. They are both swappable from 16:9 to 4:3 aspect ratio and have wide dynamic range and battery voltage displayed on screen.

My latest favourite camera is the Runcam Phoenix 2. It's a lot smaller and cheaper than the Eagle but with great image quality.  It doesn't have OSD voltage.

It is possible to use the TV out signal from an HD camera like a Mobius or GoPro, but it is not as safe as a stand alone FPV camera. Any issues with the HD camera recording or battery could interfere with your FPV view.

More information on that here - Other FPV cameras 


To connect the camera to the VTx I solder on a male servo-style connector to the +V, Ground and Yellow. If the camera also has Voltage display capability I connect the Voltage sensor wire to directly to the Red +V wire so I can see the flight battery voltage on screen.


The camera and VTx can be safely powered from the 3S or 4S flight battery. I use a servo style Y lead with one end changed to a female balance plug (3S or 4S as required) for power. The Y lead provides flight battery voltage to the camera and VTx as well as passing the video signal from the camera to the VTx


For a swappable FPV rig I use heat bent PVC plastic to make up a small mount.

This compact FPV backpack can be mounted with tape or velcro on to any plane.


All of this gear is available from Banggood via the links above, and these category links
BANGGOOD website
BANGGOOD RC


Friday, 26 January 2018

Aomway Commander V1 Head tracker module

The Aomway Commander V1 FPV goggles have the option of adding a head tracker module. This means you can pan and tilt an FPV camera by moving your head around.  The head tracker module sends the head movement signals to the Taranis radio via a cable connecting the goggles to the Taranis trainer port. Then the Taranis transmits the signals to the reciever on channels 7 and 8 as TR7 and TR8, trainer inputs.
The Commander V1 Advanced version comes with the head tracker installed. I have the non advanced version so needed to buy and install the module myself.

I purchased it direct from Aomway www.aomway.com and it came with the trainer cable, ribbon cable, mounting screws and spare push buttons. They don't actually have an online shop but send an email to "Sales" to enquire about purchasing.
I also bought a replacement DVR ribbon cable to replace the cable I had previously damaged. They are quite delicate and you must be very careful not to jam the cables when reassembling the case.

Fitting the headtracker module

One screw in the nose area allows the face plate to be unclipped. Two screw underneath hold the case together. 

Open carefully and don't over stress the ribbon cables.


There is only one spare port for the headtracker to plug in - right side, middle port, and only one way it will fit on to the mounting posts. 

I removed the top cable for better access while fitting the module. 

DVR ribbon cable replacement

Here is my damaged DVR cable. 
It was jammed between components during reassembly after I opened the goggles for a peak inside.

Push the grey clamping bar to the left to release the cable

VERY carefully reassemble the goggles making sure no cables are caught between components. The DVR cable can get in the way of the SD card slot.

Video version with the head tracker working


Thursday, 20 July 2017

What FPV cameras do I use?

I'm no FPV expert and actually prefer line of sight flying. However I do dabble with fixed wing FPV occasionally and really enjoy having the plane in the video view. This could be called Third Person View maybe. I have very little interest in FPV multirotors.
Here is a playlist of all my FPV reviews - Youtube link

FPV Cameras
There are so many options these days with Foxeer and Runcam competing almost weekly with new dedicated FPV cameras, and most action cams offering FPV or TV Out as well.

It's important to note that our analogue video transmitters only send standard definition video. The picture quality is not great compared to even the most basic Action cam recording. High definition digital video transmitters are now being released, but they are still bulky and expensive.

You can use dedicated FPV cameras or Action cams for FPV, but it's probably safer to use a dedicated FPV camera because Action cams can shut down or freeze with low battery or insufficient storage space. Dedicated FPV cameras tend to have much less delay or latency in the video feed than action cams as well, which is important for control at high speed. FPV cameras are usually 4:3 aspect ratio and Action cams are 16:9.

Dedicated FPV cameras
These are really just fancy security cameras, mostly with CCD sensors but a few with CMOS sensors. They usually have screw mounted lenses ranging through 2.8mm, 2.5mm and 2.1mm. I prefer the widest view of a 2.1mm lens and these can be purchased from places like Banggood for a few dollars.
Either the sensor or the lens will have an Infra Red filter fitted. In most cases the IR filter is on the sensor so you would buy a lens without the IR filter. Most are 4:3 aspect ratio and standard definition. 16:9 aspect ratio cameras are becoming available. If the option is available it is a good idea to turn on High Dynamic Range or DHDR in the camera setup to give the best video feed in difficult lighting conditions.

Surveilzone, Foxeer and Runcam HS1177
This is the first FPC cam I bought, mainly for it's small low drag casing. It turned out to be the most commonly used FPV camera in the RC community. It has a 4:3 600TVL CCD sensor which handles light and dark areas better than the cheap CMOS cameras.

Here is a review of the Runcam PZ0420M and Foxeer HS1177


Runcam OWL plus 4:3 - Gearbest link
In the above review I also look at the Runcam OWL plus with it's enhanced low light sensitivity.
This camera is a night flight specialist.

Runcam EAGLE 16:9 CMOS - Runcam link
The Eagle is the first of a new breed of FPV cam using a CMOS sensor with enhanced global high dynamic range. That means that the video image is processed to ensure there are no blown out skies or dark foreground. The effect is amazing and makes FPV flying a wonderful experience. With cheaper cameras on cloudy days it's almost impossible to fly because all you see in the goggles is black ground or white sky. The Eagle brings back all the detail and comes in a wide screen 16:9 aspect ratio version. Most other cameras are 4:3 aspect ratio. This is quite an expensive FPV camera at about A$80 and the default sharpening settings are too high, giving jaggy and shimmering edges, but after adjustment this is a superior FPV cam. This is my favourite FPV camera for old school cruising because it fills the screen of my 16:9 goggles with an unstretched image. However it doesn't have flight battery voltage OSD.


Foxeer MONSTER (Version 1) 16:9 - Tomtop link
This is a cheaper 16:9 aspect ratio camera with 1200TVL CMOS sensor and 2.8mm lens. It's a great camera in sunny conditions with that lovely screen filling 16:9 view.
There is a second version now available with on screen display and WDR added.


Foxeer New Arrow - Tomtop link
Foxeer Arrow 3 - Banggood link
Runcam Swift 2 - Runcam link

These are the latest high quality 4:3 aspect ratio FPV cameras and are currently the most commonly used in the RC community. They have evolved from the early HS1177 to offer excellent HDR and On Screen Display of flight battery voltage, pilot name and flight time. This is a fantastic development meaning you don't need a separate system for OSD to keep track of your battery voltage. However you do need to connect an extra wire from the battery + lead to the camera.

See my FPV playlist for reviews.
Any of these three are my favourites for fast flying wings, because of the voltage OSD and easier to view 4:3 aspect ratio at high speed.


Runcam Swift mini - Banggood link
This is a smaller version of the Runcam Swift without the OSD, designed for mounting in smaller spaces.

All of the above cameras can be powered by 2S to 4S batteries or 5 to 17 volts. Some other cameras can only take 5V. You must read the specs to determine what your camera requires.

Coming next - FPV transmitters, receivers and antennas

Sunday, 22 January 2017

Eachine VR D2 FPV goggles

Banggood sent these goggles to me for review. I needed to add 2 x plus 4 close-up glasses before I could focus on the screen. I really like the diversity receiver with antennas supplies. One clover leaf and one patch antenna. And I love the built in DVR.

BANGGOOD purchase link

Here are the recorded video sizes with examples, and the review video with some flight footage.
(Images are not exact scaled sizes - limited by Blogger image display options)

4:3 camera - VGA recording 640 x 480 (4:3)

4:3 camera - D1 recording 720 x 480 (3:2)

4:3 camera - HD recording 1280 x 720 (16:9)


Mobius 16:9 camera - VGA recording 640 x 480 (4:3)

Mobius 16:9 camera - D1 recording 720 x 480 (3:2)

Mobius 16:9 camera - HD recording 1280 x 720 (16:9)

Review video on YouTube

Sunday, 2 October 2016

Boscam RX LCD5812 FPV screen review

This is a very nice 7" HD FPV screen with 40ch dual diversity receiver. Resolution 1024 x 600.
Removable sunshade folds down to protect the screen in transit.
AV in and out, HDMI in, USB port for firmware updates. External power port.
The only downside is that it doesn't have a built in DVR.


Watch on YouTube

GEARBEST purchase link

Wednesday, 12 November 2014

1.65m (65") Twin Boom pusher

This twin boom pusher is similar to the 1.3m Depron Spectre, however it has a straight 1.65m (65") x 190mm depron Armin wing and twin rudders.

1.3m Depron Spectre and 1.65m Twin Boom pusher

Initially it was designed it as a 1.8m light-wind slope soarer but didn't perform as well as I wanted. The longer tail booms and larger wing span made it too flexy and delicate. I was also comparing the performance to a motorless Phoenix 2000, which is a sensational sloper.
Shortened tail booms and wingspan stiffened up the airframe nicely and the addition of a motor fuselage turned it into an excellent FPV cruiser and medium wind FPV sloper. It tracks well in a straight line and has a decent glide angle but is quite agile like the Spectre.

Instead of using packing tape to cover the depron I used document laminating film, often referred to as New Stuff in the RC world. It is ironed on with a warm iron before bending the airfoil and fuselage, and works very well. It's tougher and easier to apply than packing tape.

Construction
See the depron wing build and Spectre overview videos for the basics, and the Spectre post on this blog.

Additional strengthening ...

6x1mm CF strip glued along the front of the elevator.


Heat bent UPVC brackets for the rudder to elevator joins.


I used twin rudder servos rather than one servo and a long vulnerable connecting pushrod between the rudders. Full length wing spar made from 2 Skyshark P4X spars joined with an internal CF rod joiner and epoxy. 

SPECS
Wingspan - 1.65m (68")
Chord - 190mm (7.5")
Length - 100cmm (36")
Airframe weight - 840g
Flying weight (2200mAh LiPo) - 1040g
Motor - Turnigy 2836 1100kV (260W)
ESC 30A Plush
Prop - 10 x 6"
Ailerons
Elevator
Twin rudders
TGY 9018MG servos x 2 (ailerons)
HXT900 servos x 3 (elevator and rudders)


I can email the Sketchup file if required


Initial slope soaring tests