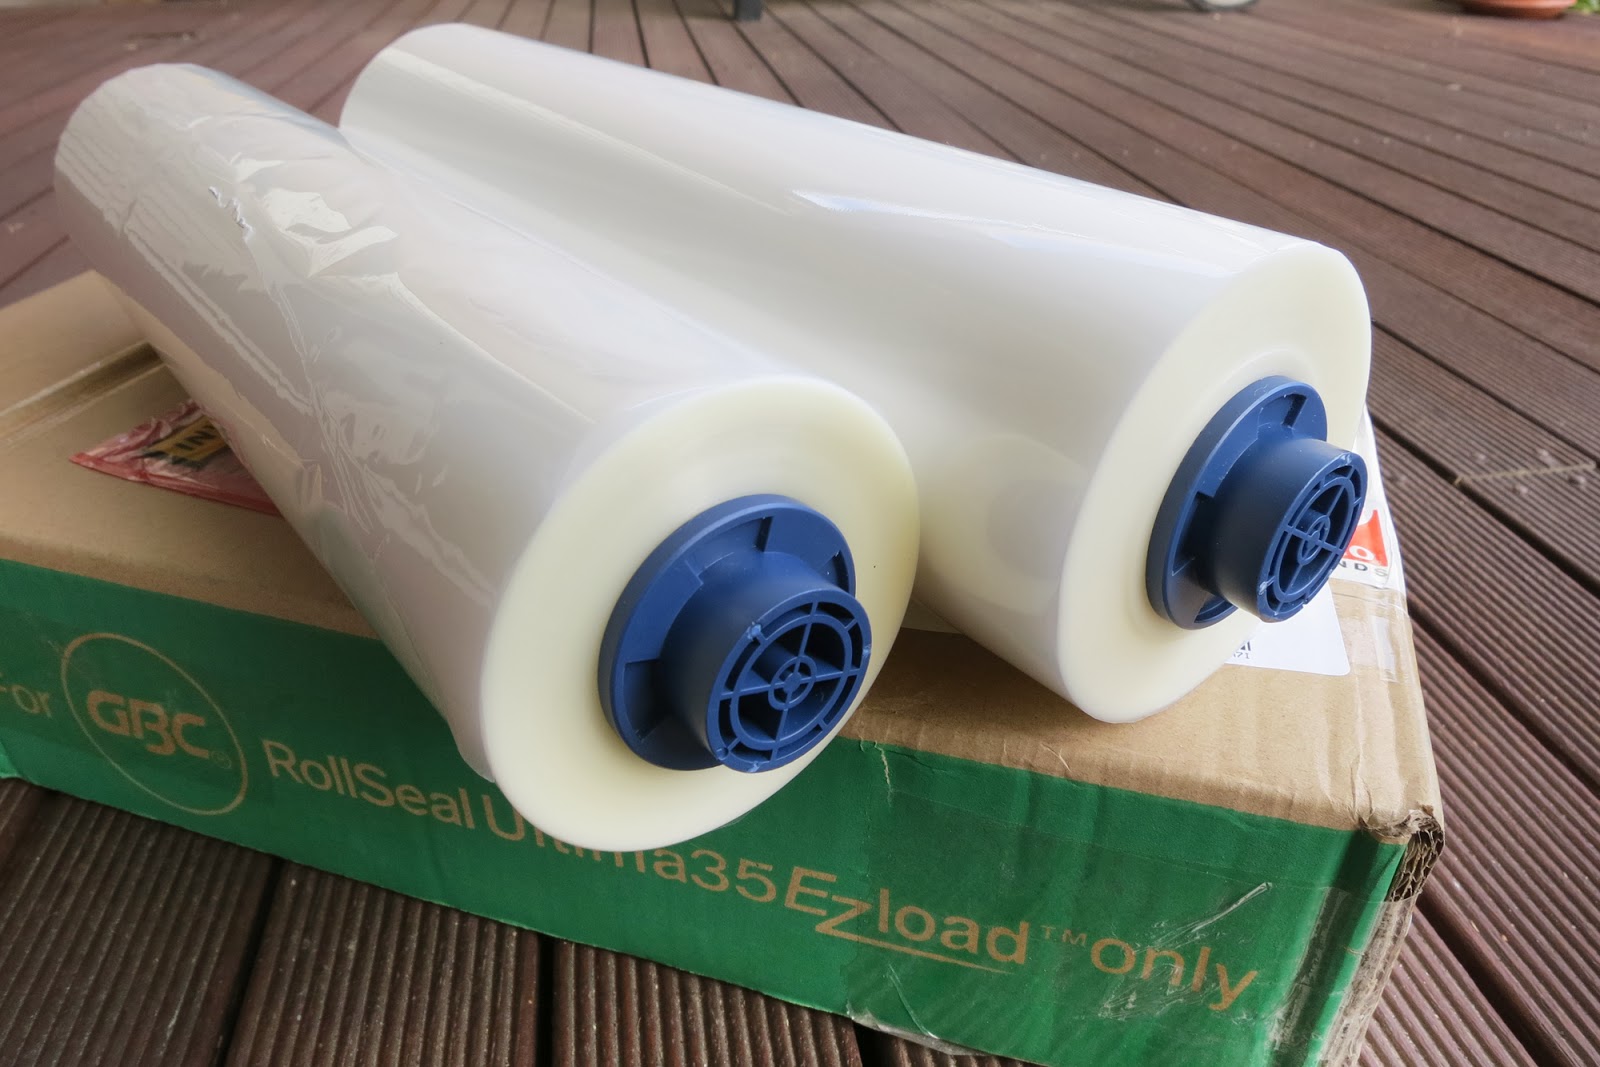
One of the cheapest and toughest foam covering materials is document laminating film. The RC community has nicknamed it New Stuff for some reason.
Initially I bought 10m each of 43 and 75micron laminate from www.aussieflight.com.au for $1/m. That amount covered Le Fish fuselage three times, the wing twice, and the wing of my next ultra light build.
If you want larger quantities you can buy full rolls from a laminating supplies business. It works out much cheaper per metre.
I bought two GBC EZload laminate rolls Updated GBC link (Thanks Lex_Dysia)
1.7mil (42.5micron) x 305mm x 100m
3mil (75micron) x 305mm x 60m
Price was $45/roll plus freight and GST and it's perfect. Goes on easily with a warm clothes iron (Wool setting) and it will cover many future planes.
The new solid 3mm CF elevator axle / spar is working perfectly.
I removed 10g from the nose to move the CG back to 80mm giving much better inverted flight control. Decreased the "normal flight" elevator throw and increased expo for smoother flying. Full throw, about 60º, is still available via the momentary switch.
I tried moving the pushrod down one hole on the elevator control horn to get 90º throw for proper mad flips but the elevator would return fully inverted. Might need to move the control horn back from the pivot axis or try a pulley system.
The vertical stab and rudder CA hinges failed in a nasty upside down crash so I re-glued the join and used clear gaffer tape for the hinges.
Anyway I'm steadily ascending the aerobatics learning curve and having great fun in spectacular locations. Here's some video from 13th beach in a lovely 10kn breeze then some thrilling 20 to 30kn later in the day.
After 3 hard sessions of flying (and crashing) it's time to assess how my build methods held up, and share some setup tips.
The wind has been 15kn gusting up to to 20kn for every flight. At that wind strength it's easy to lose control of the glider and see it cartwheeling backwards across the top of the slope, but I guess it teaches quick reactions and accelerated learning.
Elevator spar / axle
The 3mm CF tube elevator spar / axle snapped on the first day, a clean break across the fibres, which is very unusual for CF tube. That leads me to think it was a pre-existing weak point. So I replaced it with another 3mm tube. Dremel and knife freed the spar from the elevator planes.
The new spar broke on the second session, but cracked along the fibres this time, from torsion stresses maybe. Conclusion - 3mm CF tube with 0.5mm wall is not strong enough for the job. So for the third spar I glued a 2mm rod inside 3mm tube (until I can source solid 3mm rod) and that seems to be holding up OK, although two elevator planes don't feel as solidly locked to each other as I would like.
Fuselage laminate covering
The light 45um laminate did not bond well to the fuselage and came unstuck right down each side. Might have something to do with the fuselage flexing on impact.
So I tore it all off and recovered the fuse with 75um laminate. This was a bit fiddly with the plane fully assembled. I used 300mm x 50mm strips along the entire top and bottom with lots of tabs cut for the curves, 2 layers built up forward of the wing, single layers above and below the wing and two layers running down to the tail. The result is much stiffer, smoother and better bonded to the foam.
Fuselage cracks
While the fuse was undressed I checked all over for cracks. The nose was split open a little, there was a vertical crack just behind the wing leading edge, and the wing / fuselage join had parted in places. Gorilla glue to the rescue. I also added clear gaffer tape to protect the nose. This stuff is great, very strong and more stretchy and flexible than the coloured cloth tapes.
Loose servo
The elevator servo had broken loose in its hole. Just needed a few drops of CA to fix it back in place.
Transmitter setup
Full throws on the control surfaces are way to much to start with so I dialled in 50% dual rates for everything, 50% expo for rudder and ailerons and 70% expo for elevator.
I still wanted full throws available for attempting mad stunts so programmed the momentary switch to turn off dual rates and expo.
Snap flaps can be switched on, giving about 8% camber (down ailerons) for up elevator and 8% reflex (up ailerons) for down elevator. Apparently that makes loops and turns sharper.
I have full throw flaperons / spoilerons on the throttle stick, called 4D by some folks, for on-demand camber changes. I have only used this for landing so far. The curve for this mix has a 50% dead zone in the centre so I'm less likely to make camber changes accidentally.
I also have 15% and 30% flaperons on the 3 position switch for low lift times.
Centre of Gravity
Doing a loop
Initially I set the CG at about 70mm which is OK for starters but noticed heaps of up elevator was required to fly inverted. This tells me the CG is too far forward, so by removing 10g of nose weight it is back at about 80mm now. That will make the elevator more sensitive so I may need to add more expo to keep it flyable. The next flight will sort that out.
The forecast was for 15kn NW increasing to 30kn mid morning, so I raced out early to the closest NW slope - Pt Henry.
The actual wind direction wasn't great, 45º off the the right, but OK for a first throw.
On the first crash the elevator had inverted and I clumsily cracked the spar / axle twisting it back the right way. The off side of the elevator could almost rotate independently of the controlled side but I decided to press on regardless to a better slope at Clifton Springs. .
In the meantime the wind had increased to 15 to 20kn but from a perfect direction.
Here's the maiden video warts and all. Le Fish flew spectacularly and I even managed a few tentative loops and inversions. Gliding back and forth along the slope was so smooth and controlled. I can only improve from here.
I learned not to take my hand off the elevator stick before trimming for level flight. I reached up to turn on the GoPro and the plane went into a dive and disappeared down the slope. It landed in nasty head height scrub but no damage apart from a few scratches to the pilot.
Dual rates and expo of 50% for everything helped calm the flight down for this first test.
A new stronger elevator spar / axle was fitted afterwards. 3mm CF tube with 2mm rod glued inside this time. Might still need a solid 3mm rod for durability.
Le Fish is a 60" EPP foam aerobatic slope soarer, designed in 2005 by Californian Steve Lange (slopeaerobatics.com) and sold in kit form by Leading Edge Gliders for US$140 plus US$54 international postage.
The first time I saw video of Le Fish performing crazy stunts I was awestruck. These mad slopers can fly like they are possessed. Have a look at this to see what I mean.
Leading Edge Gliders have changed the design slightly by increasing the wingspan to 66". However the designer recommends sticking to the original 60" for snappier performance and easier transport.
The LEG kit includes foam wing cores, foam fuselage in 2 halves, balsa tail parts, carbon and timber wing spars, carbon longeron (or is it a bottom wing spar?), 2 yellow plastic pushrod with red plastic casings (Gold-n-rod 503) and an accessories pack
The pack contains…
2 x 2mm short wire pushrods (ailerons maybe)
2 x nylon pushrod locks (fit over an L bend)
6 x brass clevis (one of mine is already installed)
4 x short threaded rods (pushrod adjusters)
4 x control horns and bolts
3 x hairy plastic bits (CA hinges for rudder*)
U shaped elevator joiner
* I had no idea what the hairy plastic bits were for until I stumbled across this explanation.
The rest, including covering material and electronics, is up to you to source.
The recommended covering these days is laminating plastic for documents or posters, referred to in the RC world as New Stuff. It's very cheap, tough and comes in a variety of weights. I ordered 10m each of 75um and 45um from www.aussieflight.com.au for $1.00/m. It's applied with a small hobby iron or a normal clothes iron.
For servos I went for 4 Turnigy 380MG micros for about $15 each. These powerful funky transparent purple servos work well on my KAP rigs. They will be strong enough but I don't know about speed and accuracy yet.
Le Fish has evolved over the last 7 years with a vast variety of weights, materials and layouts. There are no official instructions, the idea is to build for your conditions and desired flying style.
The Le Fish Wiki explains three different build styles.
Traditional - 1kg build using extreme packing tape, strong covering material, multiple carbon and timber stiffening spars and standard sized servos - great for strong winds and durability.
Middle weight - 700g using lighter covering, less spars and smaller servos - a great all rounder.
Feather weight - 500g using depron tails, no longerons, micro servos and the lightest covering - a light wind specialist.
The most common wind strength here is 15kn so middle weight is right for me.
Fuselage shaping
The fuselage comes as two halves with square edges. For looks and performance you need to round off the edges.
EPP is difficult foam to shape being tough and flexible. I tried 80 grit sandpaper but that tore out chunks. Then tried plaster sanding mesh which was much better. You need to go slowly and sand in one direction with long smooth strokes. It's up to you how far to go. Sand away till it looks good is my advice.
Some beads of foam will be pulled out but that can't be avoided and the iron-on laminate covering will smooth out the surface.
I sanded a big chunk out from the wing cutout area but it was easily repaired by glueing in a scrap of foam and sanding flat.
Here I'm sticking the wing cut closed with 5 min epoxy. I suspect it would be better to do this before shaping.
Servos and electronics layout
Next you need to decide where your electronics and servos will sit. This can take a fair bit of thinking time. It's a good idea to read all the Le Fish threads on RCGroups and decide what you want. There are no rules but it's good to keep the weight forward and to make sure everything can move as intended.
I went for a similar layout to the Swiss Fish build with aileron servos just in front of the wing, rudder servo inside the hatch and elevator servo just behind the wing (for the Mad Stab setup). Mad Stab is when the entire horizontal stabiliser can rotate 90º up and down, allowing for crazy end over end tumbles.
The carbon longeron runs from the very rear of the fuselage passing under the wing and low enough to leave room for the aileron servo.
A Dremel with the milling bit works well for removing foam but it's tricky to hold a straight line. Take care and go slowly with a firm grip on the Dremel.
I used brown Gorilla Glue (for the first time) to fix the longeron in. Faster drying white Gorilla Glue would be better but it's not sold in Australia for some reason. A scuba weight belt held it all flat while drying.
Gorilla Glue foams up and expands on contact with moisture. Here's a little test to show the foaming.
Top - just after squirting the glue in.
Bottom - after 1 hr.
The groove was painted with water first to accentuate the foaming. There was so much expansion the skewer lifted right out of the groove.
The second groove on the right was left dry and the top half covered with tape.
Seems there are specific techniques required for successful gorilla glue use. Will I use Epoxy or Gorilla glue?…..not sure yet.
Now for the side hatch and battery / receiver space. The battery will sit in the nose as far forward as possible and the receiver behind that, accessible via the hatch.
I probably have that space and the hatch too big but we shall see. At least I have easy access to everything.
The rudder servo sits now in the top of that space. I changed my mind about the positioning, hence the filled-in servo hole in this photo. The servo and push rod were originally going to be external but that looked too ugly.
A bamboo skewer was used to poke a hole for the push rod to exit. The hole was enlarged with a drill bit. The red plastic push rod casing was glued in with CA, which takes ages to set on this foam, especially covered with tape.
Actually it took me some time to realise the red tube was the casing and the yellow tube was the push rod (called Gold-N-Rod). I initially thought they were both casings and you had to source your own push rods. Some basic instructions or even a list of the accessories pack contents would have been a big help.
The rudder servo was wrapped in masking tape and glued in with a few drops of CA. I'm thinking more of making it easy to remove rather than fixing it in solidly.
Here are the two halves ready to glue together. I added an extra carbon rod stiffener above the receiver space because the big hatch weakened the nose area. In the Ultralight build no longerons are used at all with the iron-on laminate providing all the strength, but I'm aiming for a sturdier middle weight Le Fish.
After testing the Gorilla Glue on scrap foam I decided to use it for the fuselage. I used a damp sponge to clean and moisten both surfaces. Moisture promotes foaming of Gorilla Glue which helps span any gaps.
I applied a very thin bead of gorilla glue all around one half of the fuse then spread it out with a scrap of depron. I used as little glue as possible to avoid excessive glue expansion and I may have to pull the fuse apart one day.
Weights would distort the fuse while curing so I taped the halves together with electrical tape.
Trimming and gluing the wings
5min epoxy to join the wing spars together using the aluminium joiner.
To reduce the wingspan from 66" to 60" I cut 3" off each tip
and trimmed the excess wing spar at each end
I followed these instructions for gluing in wing spars, using the wing beds lined with baking paper top and bottom to prevent sticking. Squeeze a very thin bead of Goriila Glue into the spar channel after dampening with a wet sponge. Use a dowel to scrape out most of the glue then dampen the spar and push into the channel.
Cover with baking paper, place the top wing bed on top and weight down to hold it all flat.
It worked very well for the spar with minimal foam extruding out to the top.
Didn't work so well for the wing join. It's strongly glued but I can see too many gaps in that join, more glue required.
Now for the sub trailing edge spars.
I had some 25mm x 0.8mm CF flat laying around so made up a jig for the dremel to rip it into 7mm wide ribbon spars. Hard wood spars are provided in the kit but they add more weight than needed.
Glued a 75cm spar on each wing half and overlapped the join with another 30cm section.
The overlapping section of ribbon spar was flexible enough to bend over the angle at the join without leaving a gap. Electrical tape wrapped right around the wing held it all in place while curing.
Here you can see the extra spar piece in place covering the wing join.
A sharp knife trimmed off the foamed Gorilla Glue easily
I smoothed out the sub trailing edge with sand paper. Unfortunately this created some black CF dust which stained the adjacent foam.
Wing is getting stiffer now. The covering will make it even stiffer.
Depron tail feathers
I'm replacing the balsa tail feathers and ailerons with 5mm depron to save weight. It seems very fragile but becomes quite tough when covered with laminate.
Used the kit bits as templates for the rudder.
For the full flying stab I used the version in Le Fish plans.
I won't set it up for full Mad Stab 90º throws to start off with, maybe later when I know what I'm doing..
The centre section is 6mm balsa, bearing tube is 5mm OD carbon with 3mm ID and spar / axle is 3mm carbon tube.
It's important to have a slop free fit for the bearing. I had to sand down the axle slightly for free rotation so it's as good a fit as possible.
A round file was used to shape a groove in the balsa. Bearing tube was glued in with epoxy then carefully taped level and square.
A cutting mat with 90º lines is invaluable for this sort of task.
Spar / axle epoxied into grooves cut into the elevator halves (after laminating).
I added small stainless washers either side of the pivot to protect the depron in that area.
Using New Stuff iron-on laminate
The adhesive from this laminate can goo up an iron so I went out and bought the cheapest iron I could find, $24 from The Good Guys. I kept mine on Wool setting which is medium heat.
For this build I used 43um laminate on all surfaces with extra 75um for the wing D-box and hinges.
This is my first attempt at using New Stuff and it can be a little tricky. It's not flexible or stretchy so you need to cut tabs to go around curves. Narrower tabs for small radius curves and wider tabs for gentler curves. Even so don't expect a perfect wrinkle free result. Best to practice on something flat first like the horizontal stab or rudder.
A good tip is to start by tacking it down onto a flat area first then cut the tabs where needed.
The tabs are then folded over and ironed on to the edge and around the other side. Then repeat the process with another piece of laminate for the other side.
The fuselage is the trickiest part to cover due the complex curves. Keep tension on the laminate as you iron it down to minimise the wrinkles.
You will get some wrinkles but don't stress too much about it, the end result will be fine.
Start in the middle of a large flat area and iron outwards...
then iron each tab over the edge
I felt like I was mucking it up at the time but the end result is much better than I thought.
The wing is easier with less complex curves. I wrapped one big piece around the leading edge and overlapping the sub trailing edge by about 5cm each side.
You can pop any air bubbles with a pin and iron flat.
Here I'm adding the thicker second layer to the D-box (front section from spar on top around to the same spot underneath)
Ailerons are 5cm wide depron with a 45º bevel sanded for the hinge line. Covered with laminate as well.
Left the square trailing edge as is. Apparently it doesn't make any difference.
These light depron bits are sort of treated as consumables to be abused and replaced as needed.
Slot the wing into the fuselage (it won't fit once the 'rons are on)
Attach the ailerons using the heavier 75um laminate to create a hinge. 50mm wide strips are ironed on top and bottom, with the bottom strip adhered right up into the hinge gap.
I used 3 shorter lengths for each side rather than wresting with the full 75cm length strips. Less wrinkles that way.
Gluing the wing and stab on
Now that everything is covered it's time to assemble the beast.
Measure carefully and make marks in at the wing
root leading edge and trailing edge to ensure the wing is centred and square.
Alignment marks help to slide the wing out a little, apply glue then slide it back into position.
You can flex the gap open a bit to squeeze glue in after wiping with a damp sponge to provide some moisture.
Wipe off the excess glue.
I'd rather this join gave way in a bad crash.
Wipe down with the damp sponge again.
Finally, make sure the wing is centred and square to the fuselage once more.
Now for the horizontal stab.
I removed the laminate to allow a strong balsa to foam bond.
Gorilla Glued the stab on.
The depron stab still seemed too flexible and fragile so I ironed on another layer of 75um laminate.
Held parallel to the wing with electrical tape while curing.
Rudder hinge, that's what those little plastic rectangles are for.
Make sure you look at this info before proceeding. Great explanation and tips.
The top two are inserted into slots cut in the vertical stab and rudder, then a few drops of CA glue added to fix them in place.
The CA wicks into the foam making a very secure bond.
Just make sure you wait for at least 30min before testing it. (Unlike me)
The bottom one inserts into the fuselage when the vertical stab is glued on.
Here I'm marking the hinge slot position.
Gorilla Glue applied and vertical stab taped in place to cure.
Fingers crossed.
Hope it's strong enough and straight and square.
Connecting the control surfaces
Home stretch now.
I cut small pieces of blank credit card to spread the compression load of the control horns. I think stiffer ply would be better but credit card will do for now.
Aileron push rods made from 3mm carbon tube with 2mm threaded wire on the clevis end and L bend with nylon lock on the other end. Glued in with epoxy.
The wire pushrods in the kit were not long enough for servos in the fuselage.
Ailerons connected.
Elevator pushrod with an adjustable clevis on each end.
This setup allows for about 80º up elevator but only 40º down due to the rudder pushrod. A little cutout of the elevator would fix that.
However I'll start with conservative throws on everything.
Rudder plastic pushrod with threaded rod and clevis.
Le Fish is finished…
Le Fish needs a bit of colour so you can pick the orientation in the air. This is coloured packing tape which can be removed easily and doesn't add much weight and the canopy is black book covering contact.
The 5xAA battery pack put the CG about 50mm too far forward. For stronger winds I could use that battery and add tail weight.
Correct starting CG of 75mm from wing LE worked out by using two 500mAh 3S LiPos and a BEC, which results in a minimum flying weight of 640g (22.5oz)
I'll keep searching for the ideal single battery pack, maybe 5xAAA.
Couldn't resist having a throw in the backyard.
Update 7th Jan 2014: Narrated build video is up now
 Initially I bought 10m each of 43 and 75micron laminate from www.aussieflight.com.au for $1/m. That amount covered Le Fish fuselage three times, the wing twice, and the wing of my next ultra light build.