How to simplify INAV model setup and start flying sooner.
The key to simplicity is having a plane that is trimmed and balanced well mechanically, and just starting with the basic INAV modes. The default tuning PIFFs (stabilisation parameters) will be OK for most normal performance planes using INAV 6 and beyond.
The advanced modes like Auto Launch, Auto Tune, Auto Trim and Missions will just complicate your first INAV experience. It is much simpler and safer to get the model flying well first, then add advanced modes later.
This article is intended for fixed wing pilots who know how to mechanically set up a model for correct throws, trims and CG.
Start with a model that is easy to fly and has adjustable push rods.
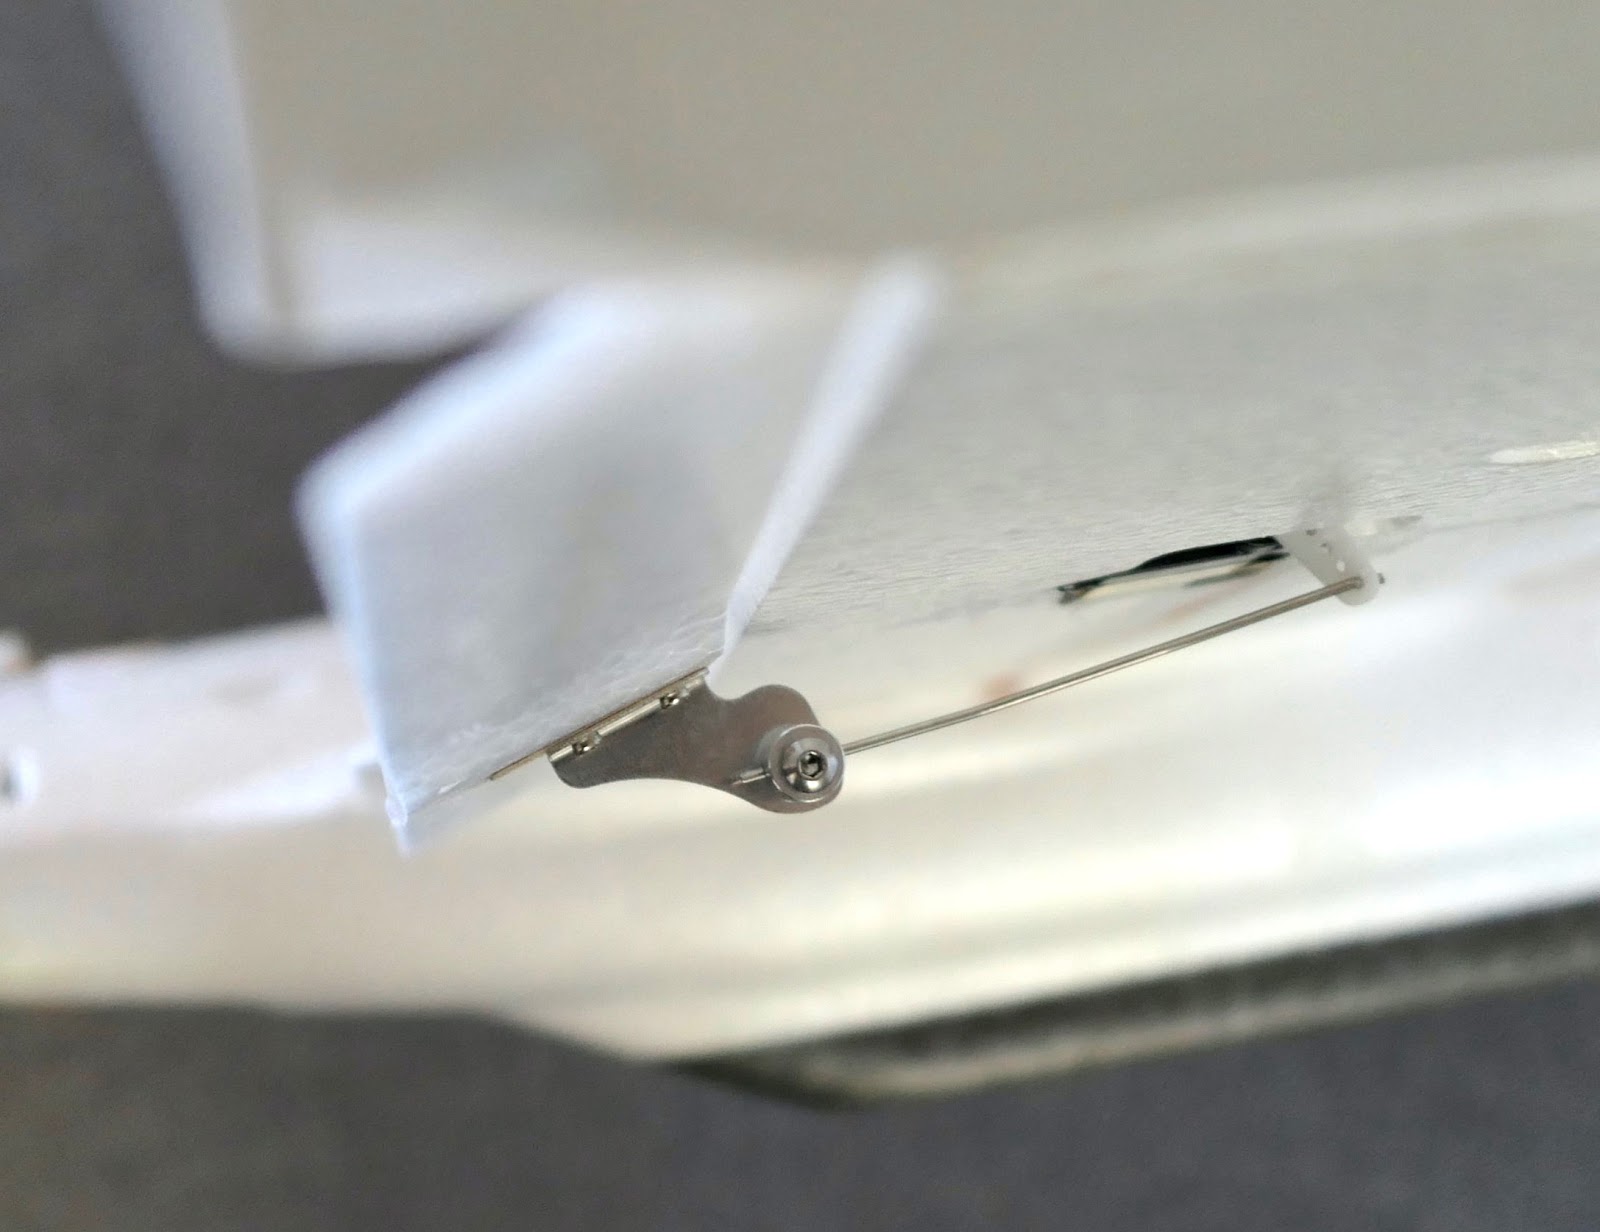
INAV manual mode uses 100% weight and 30% expo by default. So before you install the flight control board, adjust the pushrod lengths and connection holes to give reasonable throws using 100% servo travel.
Aim for about 15mm or 20º max throw up and down. This also maximises the torque and resolution of the servo.
This usually means moving the pushrod to an inner hole on the servo arm and an outer hole on the control surface horn.
If possible, fly the model first to check aileron and elevator trims and CG placement. Adjust the trims by changing the pushrod lengths mechanically and don't use the radio trims. If you can't fly first just make sure the control surfaces are level or have the recommended amount of reflex.
Radio trims should never be used in INAV because they are only fully applied in manual mode. Switching to other modes will give different trims.
The initial setup doesn't have to be perfect and it's OK if the plane is a little too agile with these full throws, as long as it is flyable.
Once the plane is close to good trim you can enable "Continuously trim servos" in the Configuration page. This will continuously save fine adjustments to the servo midpoints for level flight in Manual.
Essential INAV Modes
The only modes you need to set up initially are ACRO, ANGLE, MANUAL and RTH
ACRO is the default INAV mode and is active if no other mode is selected. In ACRO the plane is stabilised against any un-commanded rotations, like a side gust of wind. The model will tend to hold its orientation but respond normally to your stick inputs. ACRO is arguably the best general flying mode.
MANUAL is a mode that has to be selected, it is not the default mode. There is no stabilisation at all in this mode. Stick inputs are passed straight through to the servos, with whatever expo and rates are set up in INAV. It is used to check trim and CG balance, and for safety if something is wrong with other modes. Experienced pilots may prefer to fly in MANUAL mode.
ANGLE is the fully self levelling stabilised mode. It is a mode by itself, but it is also active when any of the nav or GPS modes are used. In this simplified INAV setup it is also used to check board pitch trim. Most airfoils need a few degrees of "nose-up" or "angle of attack" to maintain level flight. This trim setting can be found in the PIDS page - Mechanics Tab - LEVEL TRIM (deg). I usually start with +4 degrees then check if the plane is rising or descending in ANGLE mode and adjust as required.
Flying in ANGLE mode may feel odd to experienced pilots because you have to hold the sticks at the angle you want to fly at and it will self level when you centre the sticks.
RTH mode uses GPS data to automatically fly the model back to the home location. It can also be set as the Failsafe action, to bring the model back home if RC signal is lost. In the INAV Failsafe screen choose RTH.
The above modes are all you need for a basic setup.
If you have more than one mode selected at the same time then INAV follows the following hierarchy:
RTH is top of the tree and overrides all other modes, then Manual, then all other modes. Angle is always active when any of the GPS guided NAV modes are selected.
Non-essential INAV modes to add once you have a working model
NAV LAUNCH is fun to play with but I prefer to launch normally with full control. It is easy to muck up the switch sequence and cause a failed launch.
CRUISE and LOITER modes are useful for FPV flights but not essential.
AUTO TUNE is used to fine tune rotation rates and throws
AUTO TRIM is not needed if Continuously trim servos is enabled
Mode switches
It is best to have your starting switch positions with no modes selected, which means the board will always start in ACRO

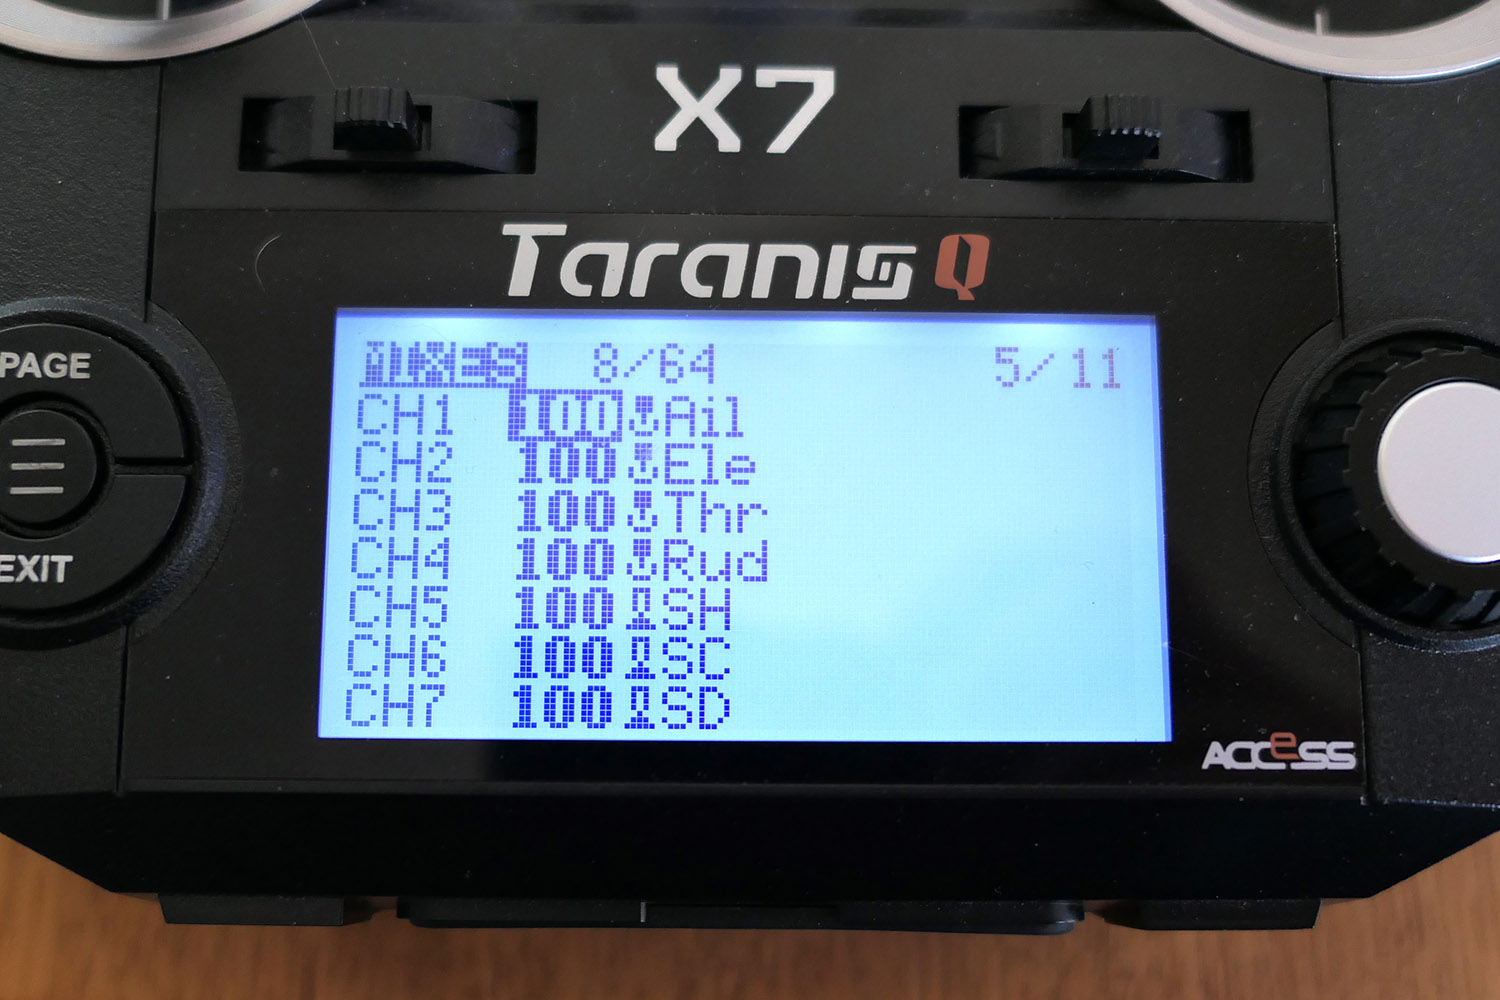
CH 5 (2 position) Nothing - ARM
Arming on CH 5 is essential for ELRS receivers
CH 6 (3 position) Nothing - ANGLE - MANUAL
CH 7 (2 position) Nothing - RTH
Extra modes to add once your INAV setup is flying well
CH 8 (3 position) Nothing - NAV CRUISE - NAV LOITER
Note that when all switches are in the "Nothing" range the board will be in ACRO
BEFORE THE FIRST FLIGHT
Check the control surfaces are responding correctly to stick movements.
Do the High 5 check.
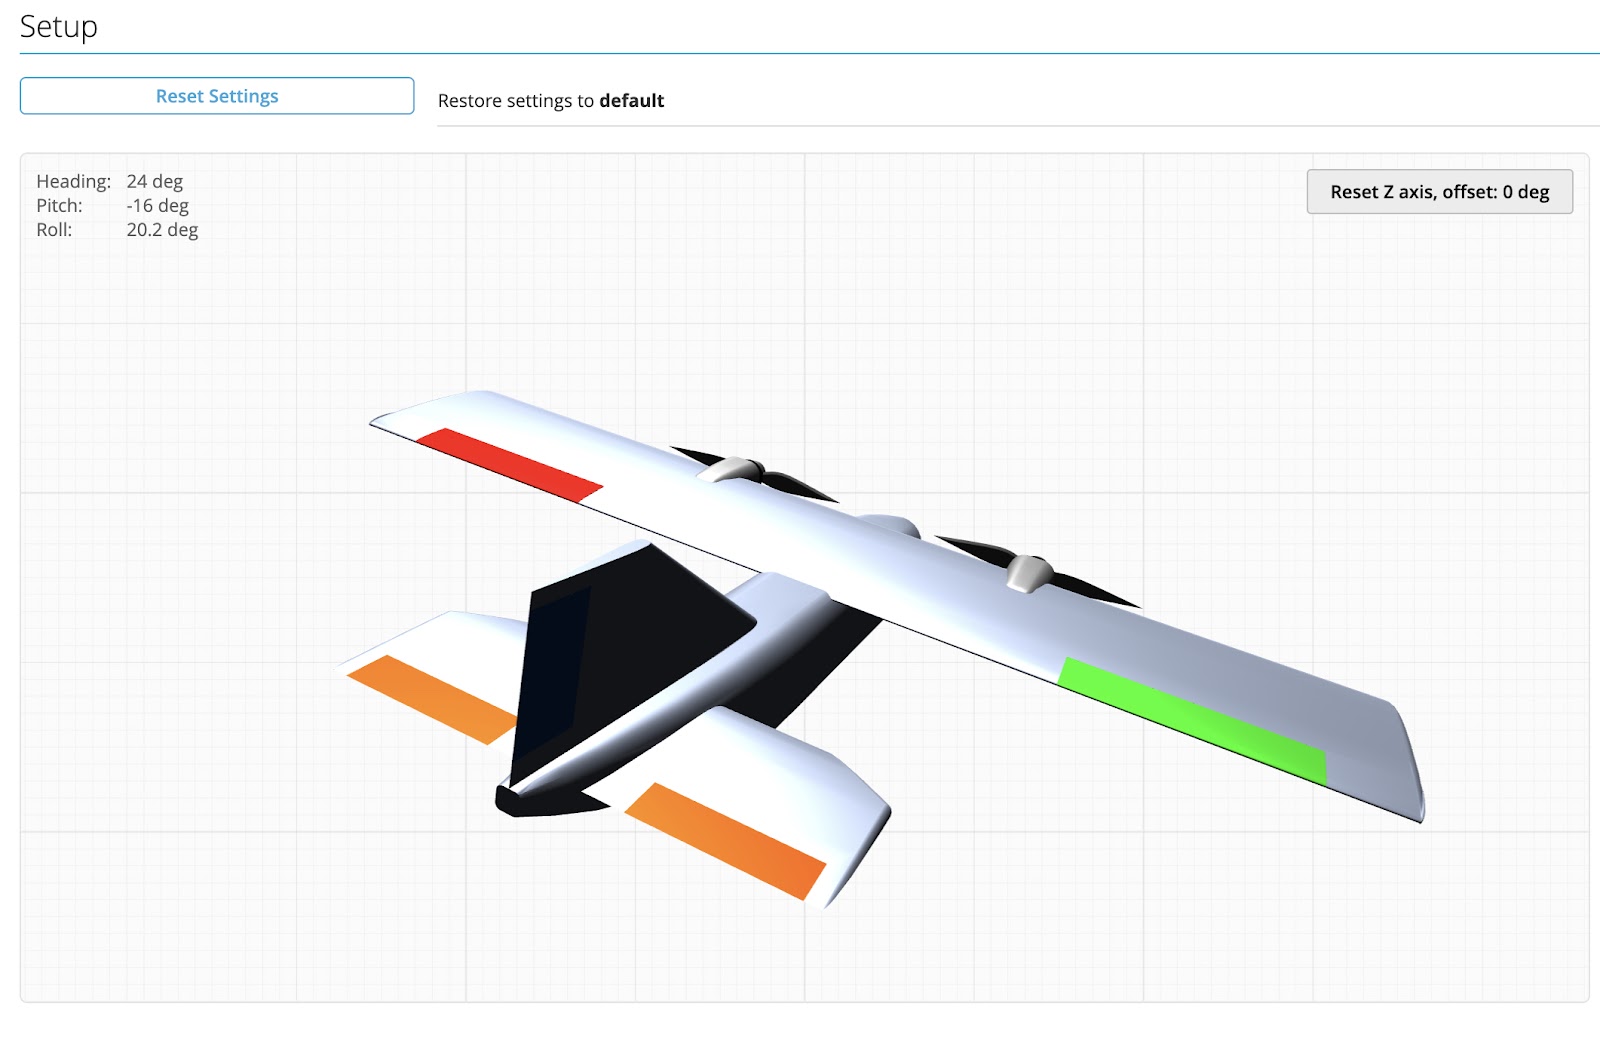
Check the control surfaces are responding correctly for stabilisation.
Switch to Angle Mode and roll the plane to the right. Check that the left aileron moves up and right aileron moves down to counter the roll. Lift the tail up and check that the elevator moves up to counter the pitch change.
ACRO Throws
Check the control surface throws in ACRO Mode. They may be too small for sufficient control. Ideally they should be about 80% of the Manual Mode throws. If the throws are too small go to the PID Tuning page and increase the FF parameter for Roll and Pitch, then check throws again. If there is no difference between ACRO and MANUAL Mode throws then FF is too high.
This will ensure you have enough control to launch in ACRO Mode and some headroom for stabilisation.
First Flight adjustments
On the first flight I will launch in MANUAL then switch to ACRO and fly a few circuits to make sure the plane is flying OK.
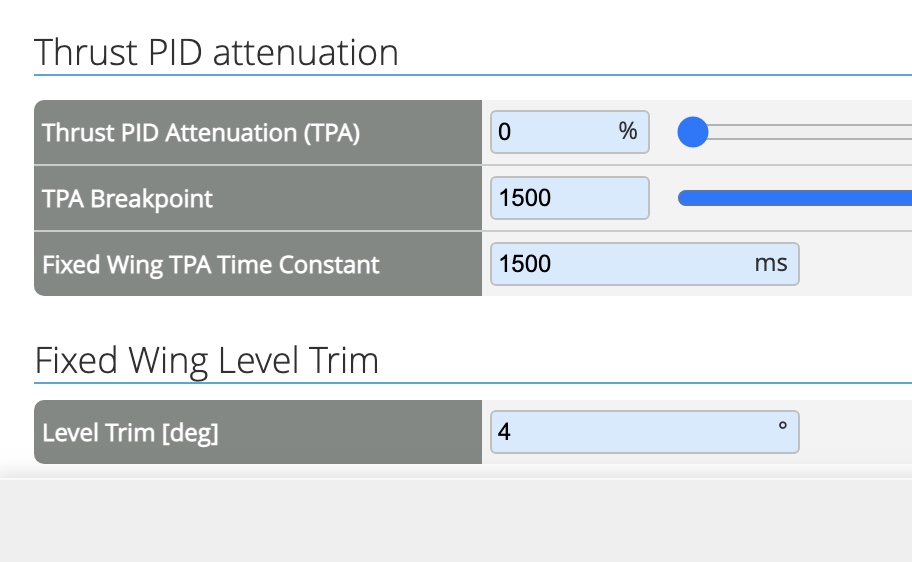
Switch to ANGLE mode. Take note of whether the model holds altitude or climbs or descends. If you haven't entered anything in the Fixed Wing Level Trim window then the plane will most likely descend.
I usually start with +4º and adjust more or less from there.
Launch again, climb to about 50m, fly out a bit then try RTH. Your model should turn and fly back to the arming site and circle above you at about 50m altitude and radius of 75m.
If that all works then you are ready to continue your INAV adventure.